How to Build a Professional Home Podcasting Setup on Any Budget

What's the Minimum Equipment Needed to Start a Podcast?
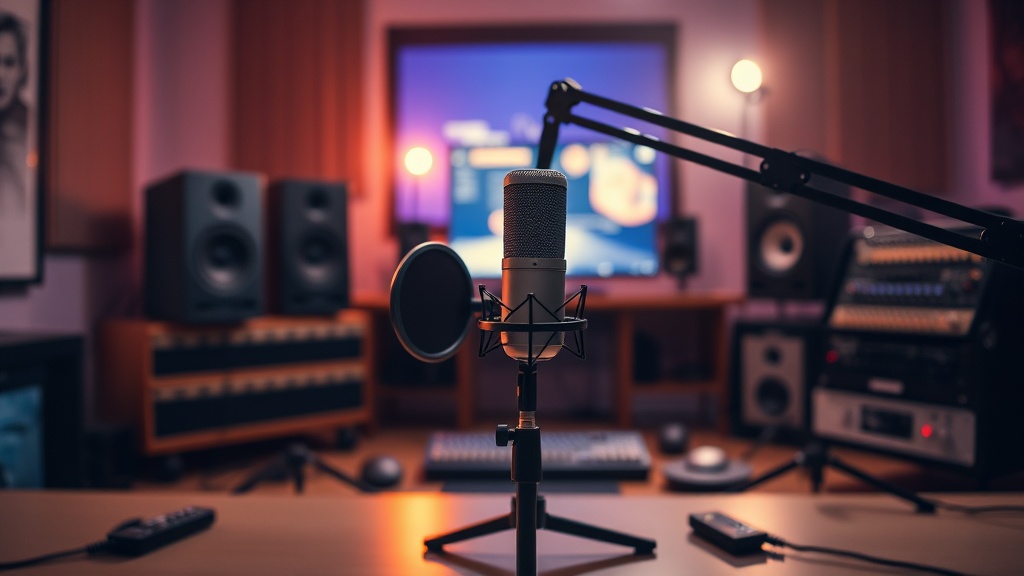
You need three things: a microphone, headphones, and a recording device. That's it. The marketing machine wants you to believe that professional podcasting requires a studio full of gear, but some of the most downloaded shows started with nothing more than a USB mic and a laptop on a kitchen table.
Here's the thing: audio quality matters, but content matters more. A $3,000 signal chain won't save boring conversation. That said, listeners won't stick around for episodes that sound like they were recorded through a tin can, either.
The real question isn't what gear you need—it's what problems you're trying to solve. Room echo? Background noise? Multiple voices? Each problem has a specific fix, and buying the wrong microphone (the most common mistake) just throws money at symptoms instead of causes.
How Much Should You Spend on a Podcast Microphone?
Between $80 and $250 gets you a microphone that sounds indistinguishable from broadcast-grade gear to 99% of listeners. The difference between a $100 Audio-Technica ATR2100x and a $900 Shure SM7B? Almost nothing after proper EQ and compression.
Let's break down the actual options by recording environment:
| Microphone | Price | Best For | The Catch? |
|---|---|---|---|
| Audio-Technica ATR2100x | $79 | Solo hosts, USB/XLR hybrid | Plastic build won't survive road abuse |
| Shure MV7 | $249 | Dynamic sound without a cloudlifter | Treble response can sound harsh untreated |
| Rode PodMic | $99 | Multiple hosts in same room | Needs an interface—no USB option |
| Shure SM7B | $399 | Treated rooms, pro studios | Requires $200+ in supporting gear |
The ATR2100x punches so far above its weight that it's almost annoying. Dynamic capsule, USB and XLR outputs, and a frequency response tailored for speech. You'll upgrade eventually, but you won't outgrow the sound.
The SM7B? It's a studio legend for a reason. But here's what the YouTube reviews don't mention: that microphone needs gain. Lots of it. Budget another $150 for a Cloudlifter or FetHead plus a preamp that can actually drive it, or you'll wonder why your recordings sound thin and noisy.
What Audio Interface Do You Need for Multiple Hosts?
Two-person shows need two XLR inputs. Three-person shows need three. Simple math beats fancy features every time. Skip the single-channel interfaces entirely—even solo hosts eventually want to add a guest.
The Focusrite Scarlett 2i2 ($179) dominates this space because it just works. Drivers stay stable. Preamps are clean. Build quality survives the occasional coffee spill. For three or four voices, the Scarlett 4i4 ($279) adds the extra inputs without forcing you into rackmount territory.
Worth noting: USB microphones can't connect to audio interfaces. That "hybrid" ATR2100x? The XLR output bypasses the internal USB converter, giving you a cleaner signal path. Buy once, cry once.
Some hosts swear by the Rodecaster Pro II ($699), and for good reason. It's an interface, mixer, and recording device in one box. But that's not beginner gear—that's "I run a podcast network" gear. Start simple. Add complexity only when your workflow demands it.
How Do You Soundproof a Room for Podcasting?
You don't. Soundproofing blocks outside noise from coming in. What you actually need is acoustic treatment—materials that absorb reflections inside the room. Two completely different problems, two completely different solutions.
Soundproofing requires mass: thick walls, heavy doors, decoupled floors. Acoustic treatment requires porous absorption: foam panels, fiberglass, thick curtains. The first stops your neighbor's lawnmower. The second stops your voice from bouncing off the walls and creating that "cheap podcast" echo.
Here's the thing: treatment doesn't have to look professional to work. A closet full of clothes acts like a $500 vocal booth. Bookshelves break up reflections. Hanging blankets behind the mic position (not just anywhere) absorbs early reflections that cause comb filtering.
If you're buying panels, skip the cheap Amazon foam—it looks the part but absorbs only high frequencies, leaving muddy mids and lows to bounce around. GIK Acoustics makes proper broadband absorbers starting around $35 per panel. Four panels behind and beside the microphone position transforms most rooms from echo chamber to studio.
The catch? Panel placement matters more than panel quantity. First reflection points (the spots where sound bounces directly from your mouth to the microphone) do the heavy lifting. Find them using the mirror trick: sit where you record, have a friend move a mirror along the wall, and mark where you see the microphone. That's where panels go.
What Software Should You Use to Record and Edit?
For recording: Audacity (free) or Reaper ($60) for local recording. Riverside.fm ($15-24/month) for remote interviews. For editing: Reaper, Hindenburg, or Descript depending on your workflow preference.
Audacity does the job. Records clean audio. Exports to every format you'll need. The interface looks dated, but tape recorders didn't look pretty either, and they built the podcasting medium. Reaper adds professional routing, non-destructive editing, and plugin support that Audacity can't match. The 60-day trial is fully functional—no nag screens, no feature limits.
Remote recording introduces complexity. Zoom compresses audio aggressively. Skype drops packets. Dedicated podcast platforms like Riverside or Squadcast record locally on each participant's computer, then upload lossless files after the call. The conversation happens over video, but the recording comes from each person's actual microphone. The difference is night and day.
Descript ($12-24/month) deserves mention for one reason: it transcribes audio to text, then lets you edit the audio by editing the transcript. Delete a word in the text, it disappears from the recording. It feels like cheating. For interview-heavy shows where you need to cut filler words and rambling answers, it cuts editing time by 70%.
Accessories That Actually Matter
Don't blow the budget on the microphone and forget everything else. A $100 mic on a proper stand sounds better than a $400 mic on a desk stand picking up keyboard vibrations.
- Boom arm: The Rode PSA1 ($99) or Gator Frameworks ($59) gets the mic off the desk and into proper position. Worth every penny for eliminating handling noise.
- Shock mount: Isolate the microphone from desk bumps and foot tapping. The On-Stage MY430 ($35) handles most standard mics.
- Pop filter: Non-negotiable for close-mic'd speech. The Stedman Proscreen XL ($59) lasts forever and actually works—unlike those $10 fabric discs that just muffle high frequencies.
- Cables: Buy once from Mogami or Canare. Cheap cables fail mid-episode and add noise you can't EQ out later.
Headphones matter more than most beginners think. You can't fix what you can't hear. Closed-back design prevents bleed (your headphones being picked up by the microphone). The Sony MDR-7506 ($99) has been the podcasting standard for twenty years because it's accurate, durable, and isolating. The Audio-Technica ATH-M40x ($99) offers similar performance with slightly more comfortable ear pads for long sessions.
Budget Breakdown: Three Tiers That Actually Work
| Tier | Total Cost | What's Included | Sound Quality |
|---|---|---|---|
| Bare Bones | $200-250 | ATR2100x, desk stand, Sony headphones, Audacity | Professional enough for iTunes top 100 |
| Serious Hobbyist | $600-800 | Rode PodMic, Scarlett 2i2, boom arm, shock mount, GIK panels | Indistinguishable from NPR studios to casual listeners |
| Client-Ready Pro | $1500-2000 | SM7B + Cloudlifter, Scarlett 4i4, full acoustic treatment, Reaper + plugins | Broadcast standard—sells to networks and brands |
That middle tier hits the sweet spot. You've solved all the technical problems that ruin amateur shows—room echo, handling noise, thin sound—without the diminishing returns of boutique preamps and vintage microphones.
The real cost-per-mile calculation? A $600 setup that produces 100 episodes costs $6 per episode. A $2000 setup that produces the same 100 episodes because you got intimidated and quit costs $2000 per episode. Start where you are. Upgrade when a specific limitation—not marketing—forces your hand.
Your first episode will sound better than you think. Your fiftieth will sound professional. Your hundredth will sound like you. The gear just captures what you bring to the microphone.
Steps
- 1
Choose the Right Microphone for Your Space and Budget
- 2
Set Up Your Audio Interface and Connect All Equipment
- 3
Optimize Your Recording Environment with Basic Acoustic Treatment